Embarking on a journey to transform your space with stunning wall decor? We’re here to ensure you have all the tools necessary for a successful installation. From simple peel-and-stick decals to intricate floral designs and full wallpaper installations, we’ve got you covered. Let’s dive into the ultimate checklist to set you up for decorating success!
Preparing Your Walls
Before diving into the world of wall decor, it’s crucial to prepare your walls properly:
Wall Preparation
- Clean Cloth: Start by wiping down your walls with a clean, damp cloth. Removing dust and debris ensures a smooth application and enhances the longevity of your wall decor.

Installing Wall Decals: Easy and Quick
Peel-and-Stick Decals
Transforming your room with peel-and-stick decals is straightforward and requires minimal tools:
- Your Hands: Simply peel the sticker from its backing and apply it to the wall, smoothing out any bubbles with your hand.

Tools for Precision
If you prefer a more precise and symmetrical arrangement, consider using the following tools:
- Painter's Tape: Use to temporarily position decals before permanent application.
- Scissors: Cut out individual decals as needed.
- Level: Ensure decals are straight and aligned.
- Tape Measure: For accurate spacing.
- Pencil: Mark positions lightly before applying decals.

Installation Steps:
- Cut out each decal and plan your layout using painter's tape.
- Use a level to ensure decals are perfectly aligned before final application.
- Once satisfied with the placement, remove the backing and firmly press decals onto the wall.
Floral and Layered Decal Installations
For those who enjoy a more creative approach, layered and floral decals offer a personalized touch:
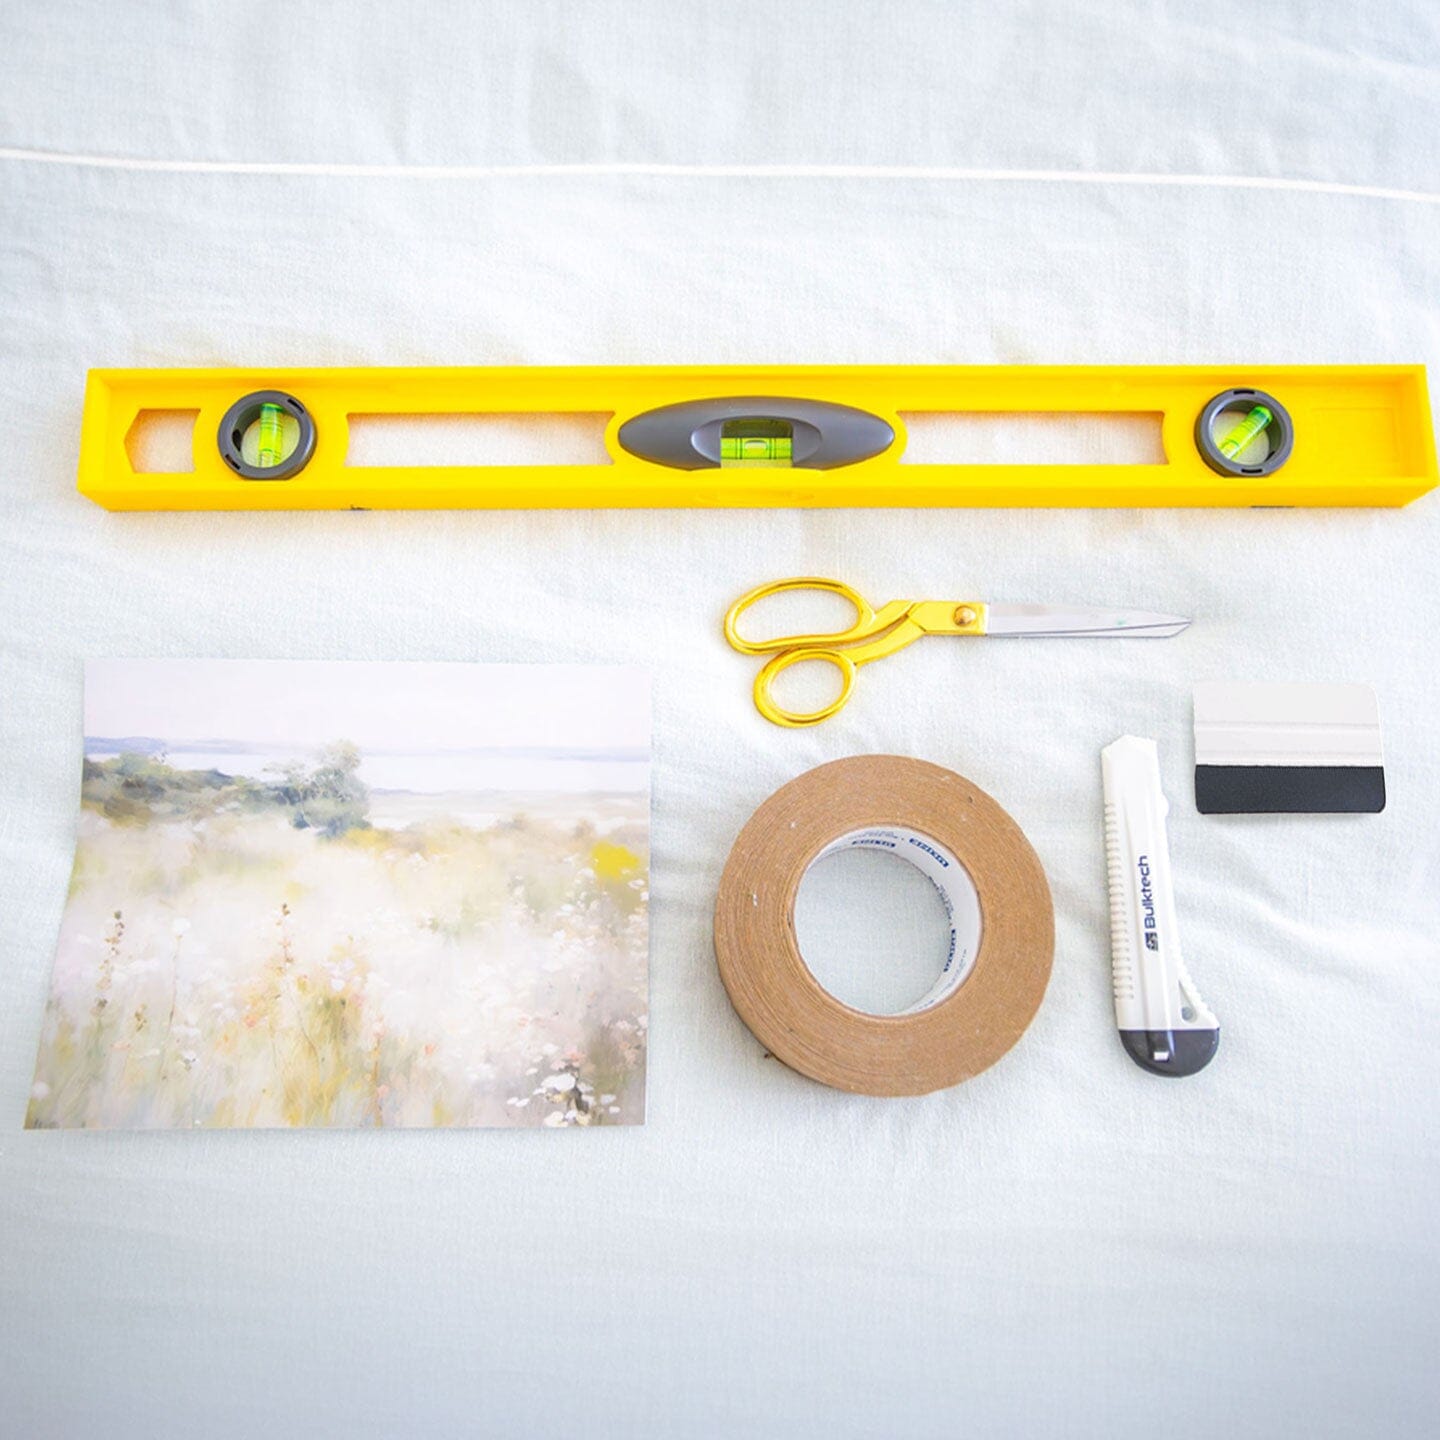
Tools Needed
- Box Cutter: Trim excess material and make precise cuts.
- Painter's Tape: Temporarily place decals to plan your design.
- Squeegee: Smooth out decals and remove air bubbles.
- Scissors: Cut decals as needed for custom arrangements.

Installation Steps:
- Organize decals into piles based on size and design.
- Use painter's tape to arrange decals on the wall temporarily.
- Adjust the layout until satisfied, then peel and stick decals in place.
- Use a squeegee to smooth out bubbles and ensure a seamless finish.
- Trim excess material with a box cutter along baseboards or ceiling moldings.

Witness the magic as we bring this garden to life through a complete floral wall decal installation.
Wallpaper Installation: Step-by-Step Guide
For a more substantial wall transformation, installing wallpaper requires precision and a few essential tools:
- Squeegee: Smooth out wallpaper panels and eliminate air pockets.
- Box Cutter: Trim excess wallpaper for a clean finish.
- Flat Head Screwdriver: Remove switch plates and outlets.
- Level: Ensure straight alignment for the first panel.
- Painter's Tape: Mark straight lines on the wall for accurate placement.

Installation Steps:
- Measure and mark a straight line on the wall using painter's tape.
- Align the first wallpaper panel with the taped line, ensuring it’s straight using a level.
- Smooth out the panel with a squeegee, working from the center to the edges.
- Use the box cutter to trim excess wallpaper at baseboards or around outlets.
- If covering switches or outlets, remove the cover plates with a screwdriver and cut out corresponding holes in the wallpaper.

Removing Wall Decals and Wallpaper
When it's time for a change, removing your wall decor is straightforward:
Removal Tools
- Hair Dryer: Apply heat to loosen adhesive for easy removal.
- Peel Slowly: Carefully peel back decals or wallpaper panels, starting from a corner.

Curious about how effortless our removal process can be? Watch our removal video HERE!
Additional Handy Tools
Consider adding these tools to your arsenal for more intricate installations:
- Craft Knife: For detailed cutting and trimming.
- Chalk Line: Mark straight guidelines for large-scale projects.
Conclusion
Transforming your space with our range of decals, wallpapers, and murals is a rewarding project that enhances your home’s aesthetics. Whether you prefer the simplicity of peel-and-stick decals or the artistic challenge of layered designs, having the right tools ensures a seamless installation. Ready to embark on your decor journey? Gather your toolkit and let's turn your walls into a reflection of your unique style! For personalized advice or product recommendations, reach out to our team today!


