Designing a space for your little one can feel like walking a tightrope between function, fun, and future-proofing. That’s where Lauren Sullivan’s boys room makeover comes in—blending playful charm with timeless style, and giving us all the inspiration we need for our next kids' room project. If you’ve ever wondered how to create a room that evolves with your child and still feels like home, Lauren’s thoughtful transformation is your blueprint.
Why a Room That Grows Matters
Lauren said it best:
“I wanted to give my son a room that he could grow with—not something we’d have to change as he gets older.”
Instead of designing something age-specific that might need a refresh in a few years, she took a more sustainable approach. The goal? A room that balances bold energy with grounded, flexible design choices.

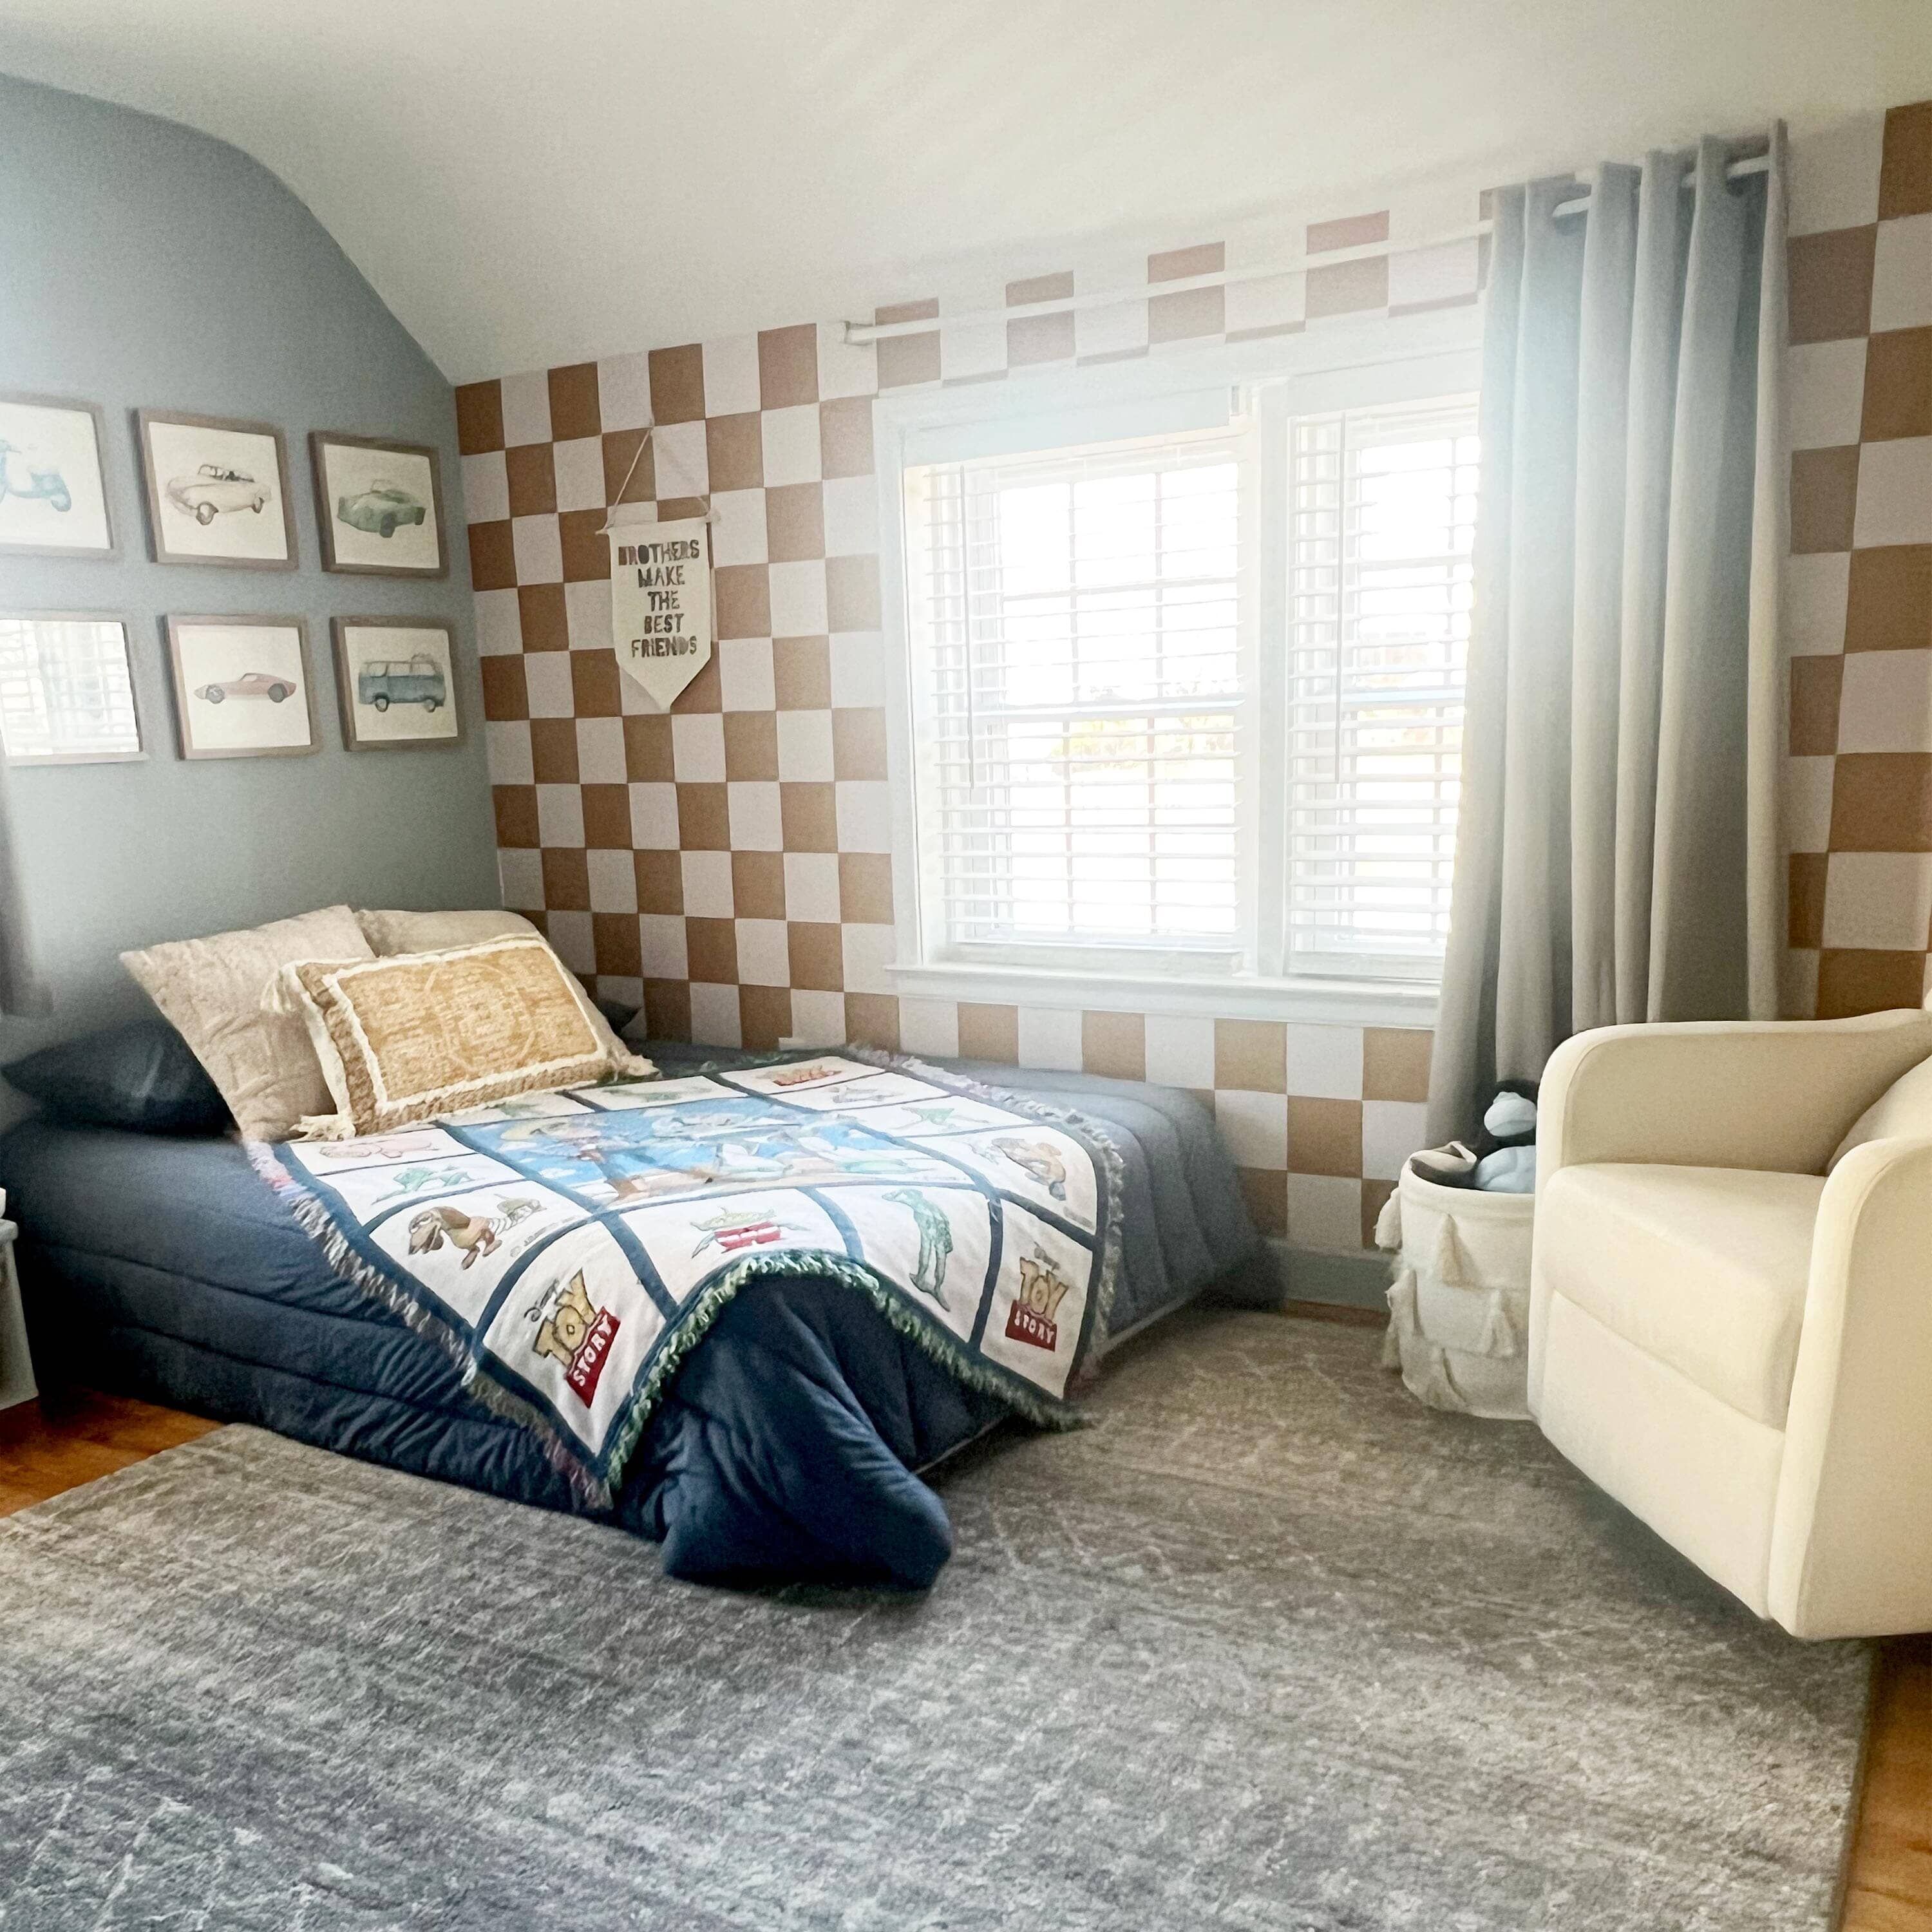
Finding the Perfect Statement Wallpaper
With blue walls already in place, Lauren was looking to weave in warmth and contrast. When she discovered our brown checkered wallpaper, it was a no-brainer.
- Earthy tones add depth without overwhelming the space
- Neutral enough to complement changing decor
- Bold enough to feel exciting for a young, growing boy
- Works beautifully with other colors like navy, gray, and warm wood tones
This wallpaper added personality without boxing her into a trend—perfect for a kid who’s growing and changing every day.

Mixing Playful + Practical
While Lauren usually gravitates toward boho design, she leaned into something a little bolder here—because why not let a kids' room be the most fun room in the house?
- The brown checkered pattern energizes the space without being too loud
- Pops of color throughout (like navy and gray) tie it all together
- Furniture and decor remain simple, allowing the wallpaper to shine
This balance of bold and minimal creates a space that encourages creativity, imagination, and of course—play!

Step-by-Step: How to Install Peel-and-Stick Wallpaper
Whether you’re going full accent wall or just adding a statement corner, installing peel-and-stick wallpaper is simpler than you think.
- Clean the Wall – Wipe down the surface so it’s smooth, dry, and dust-free.
- Plan Your Layout – Mark where the first panel will go. Use a level for straight lines.
- Peel + Position – Start from the top, peel a bit of the backing, and align the panel to your marks.
- Stick + Smooth – Use a smoothing tool (like a wallpaper squeegee) to push out air bubbles as you go.
- Trim the Edges – Use a sharp utility knife to trim any excess at the top or bottom.
- Repeat – Overlap slightly if needed, and line up patterns carefully!
Pro tip: Work slowly and have a second set of hands if possible—it makes the process even easier.

FAQs: Everything You Want to Know
Q: Can I use peel-and-stick wallpaper if I’m renting?
A: Absolutely! Our peel-and-stick material removes cleanly without damaging walls, making it perfect for renters.
Q: Will this work on textured walls?
A: Slight texture is okay, but smooth walls yield the best results. If you’re unsure, order a sample first.
Q: Is it easy to reposition if I mess up?
A: Yes! Our wallpaper is forgiving—just gently peel back and reposition as needed.
Q: How do I clean it?
A: Use a damp, non-abrasive cloth. It’s low-maintenance and built to last.

The Takeaway: Design That Lasts and Inspires
Lauren’s boys room shows us how impactful thoughtful design can be. With a few smart choices (and the right wallpaper!), you can build a space that both you and your child will love for years to come.
Ready to start your own transformation?
Browse our Wallpaper Collection and order a sample to see what works best in your space.
Want to see a wallpaper install from start to finish?
Check out our install tutorial for step-by-step guidance.


