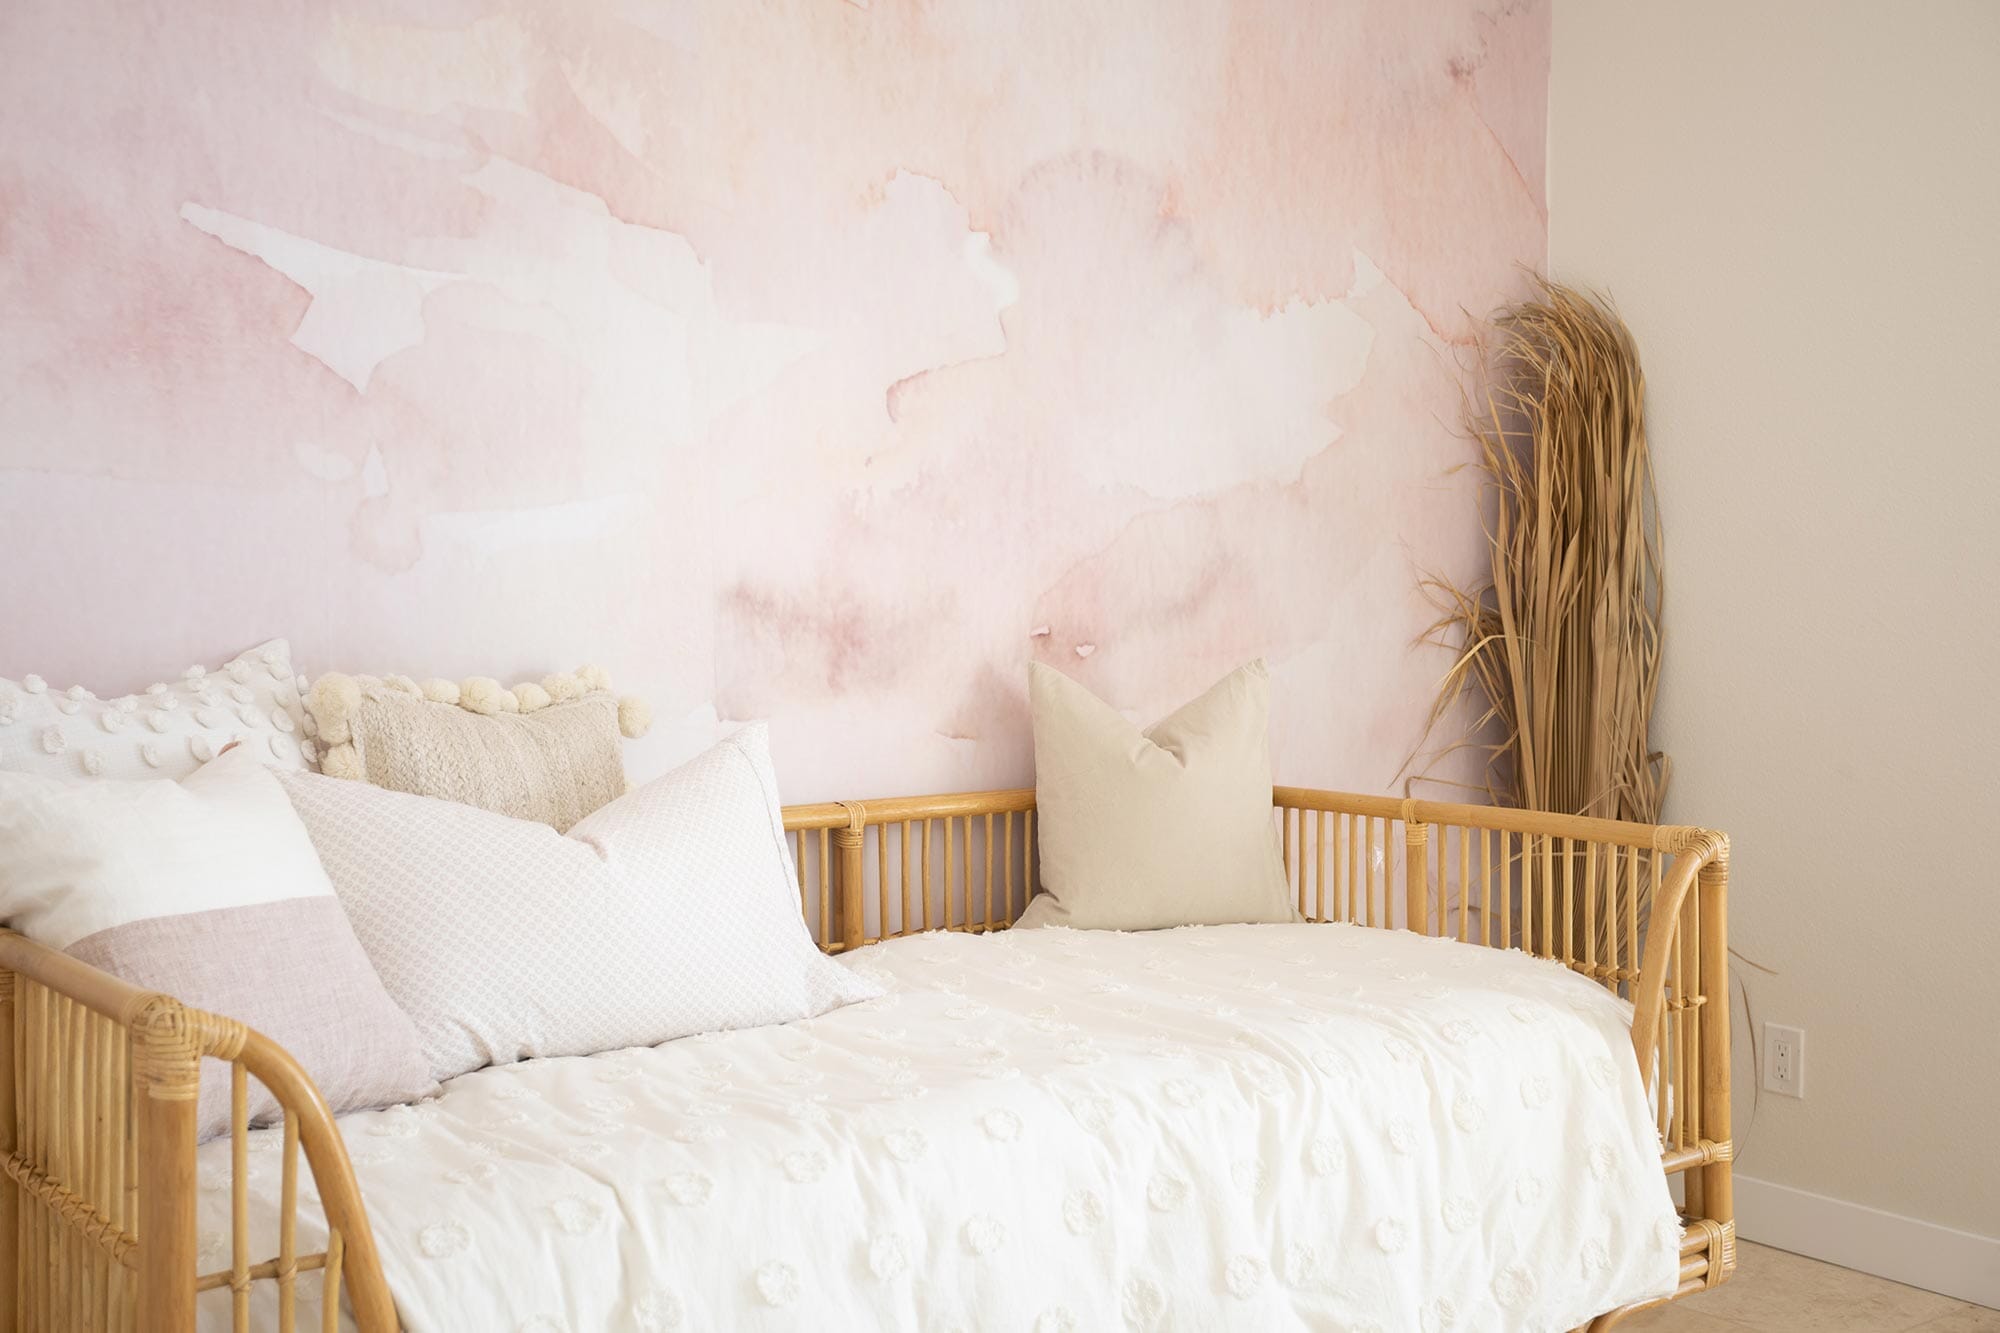
Looking to give your space a fresh, unique look? A mural might be just what you need! Whether you’re sprucing up your living room, transforming your office, or adding some personality to your bedroom, murals are a fantastic way to make a big impact. But here’s the key question: How do you choose the perfect mural size for your wall?
In this step-by-step guide, we’ll walk you through everything you need to know to pick the right mural size for your space. With just a little measuring and some thoughtful consideration, you’ll be ready to turn your wall into a work of art. Let’s dive in!

Step 1: Choose Your Material
The first step in choosing your mural size is deciding on the material. We offer two main types: peel and stick and pre-pasted wallpaper.
Peel and Stick vs. Pre-Pasted Wallpaper
-
Peel and Stick Wallpaper: This material is a dream for renters and DIYers. It’s easy to apply and remove without leaving any residue or damage to your wall. Plus, it’s great for quick updates and can be repositioned if needed. Ideal for smooth walls.
-
Pre-Pasted Wallpaper: This option is perfect if you're looking for something more permanent. It’s simple to apply—just wet the back of the wallpaper to activate the paste—and stays in place longer than peel-and-stick, making it ideal for more traditional settings. Works best on smooth surfaces.
Once you’ve decided on the material, make sure to check out our Choosing Your Wall Material article for a deeper dive into the benefits and characteristics of each material. Still unsure? We offer samples you can try before committing. Testing it out on your wall will help you feel confident in your choice.

Step 2: Measure Your Wall
Now that you’ve selected your material, it’s time to get your measuring tape out! Don’t worry—we’ll make it as simple as possible.
-
Measure the width and height of your wall in inches.
-
Record these measurements—double-check to make sure they’re accurate!
Here’s an example:
-
Wall Width: 130 inches
-
Wall Height: 100 inches
Got your measurements? Great! Now, let’s move on to the next step.

Step 3: Round Up to the Nearest Size
Once you have your measurements, it’s time to choose a mural size. Here’s a simple rule: Always round up to the nearest size. This ensures you have enough material to cover the space fully. It's better to have a little extra than too little, and the good news is that our murals can easily be trimmed to fit.
Example:
If your wall is 130” W x 100” H, you should select the 138” W x 108” H option. This way, you have a bit of extra mural to ensure it fits your space perfectly.
Don’t worry if your measurements don’t match exactly—we’ve got you covered! You can trim the edges of your mural to fit your unique space. If you need a custom size, feel free to shoot us an email, and we’ll be happy to help make it work for you.
Step 4: Check the Mural Size Guide
On every mural product page, there’s a handy size guide photo showing exactly which panels you’ll receive for each size option. This is a great reference to ensure you’re getting what you expect.
For instance, if you select the 46” W x 108” H option, you'll receive panels 1-2. Make sure to double-check the guide before placing your order to ensure you’re getting the right coverage.

Step 5: Trim and Install
Once your mural arrives, it’s time to get it on your wall! Whether you’re applying a peel and stick mural or pre-pasted wallpaper, installation is a breeze. Just follow the instructions carefully, and you’ll be on your way to a stunning transformation in no time.
If you’ve ordered a mural that’s slightly larger than your wall, you can easily trim the edges for a perfect fit. Don’t worry if this sounds intimidating—our murals are designed to be as user-friendly as possible.
Pro Tip: If you’re unsure about the installation process, we have helpful resources on our site and a friendly support team ready to answer any questions you may have!

Benefits of Using Removable Murals in Your Home
Why choose a mural for your space? Here are a few great reasons:
-
Affordable Makeover: A mural is a budget-friendly way to give your walls a dramatic makeover without the cost of remodeling. No need to paint or spend on expensive art—murals provide a high-impact, low-cost solution.
-
Renter-Friendly: Removable murals are perfect for renters or anyone who wants to add personality to their space without committing to a permanent change. When it’s time to move, simply peel it off without a mess!
-
Easy to Update: Want to refresh your space? Simply switch out your mural for a new design. It’s an effortless way to change the vibe of a room, and since murals are so easy to install, it’s never been simpler to update your look.
Shop Our Collection of Murals Today!
Ready to get started on your mural transformation? Browse our full selection of murals here and find the perfect design for your space!
Why It’s So Easy to Order the Right Mural Size
We understand that the process of ordering a mural might feel overwhelming at first, but it’s simpler than it seems! By following these easy steps—choosing your material, measuring your wall, rounding up to the nearest size, and checking the size guide—you’ll have the perfect mural for your space in no time.
The best part? Murals are a super simple DIY project that can be done with little effort and minimal tools. With our customer support and helpful guides, you’ll feel confident throughout the entire process.
Wrapping Up
Choosing the right mural size is a simple process when you know the steps to take. By selecting the right material, measuring your wall accurately, and rounding up to the closest size, you’ll ensure that your mural fits perfectly and creates the beautiful space you’ve been dreaming of.
Ready to give your walls a makeover? Explore our murals today and start your transformation. Whether you're going for a bold statement piece or something more subtle, we’ve got a design that will make your space come to life.
Transform your wall, transform your space.


